 Save
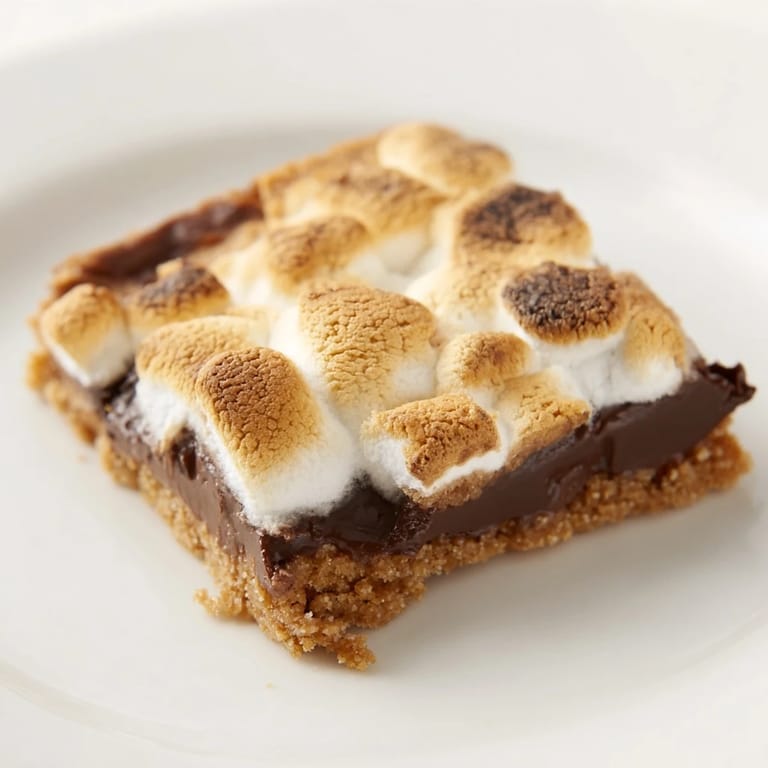
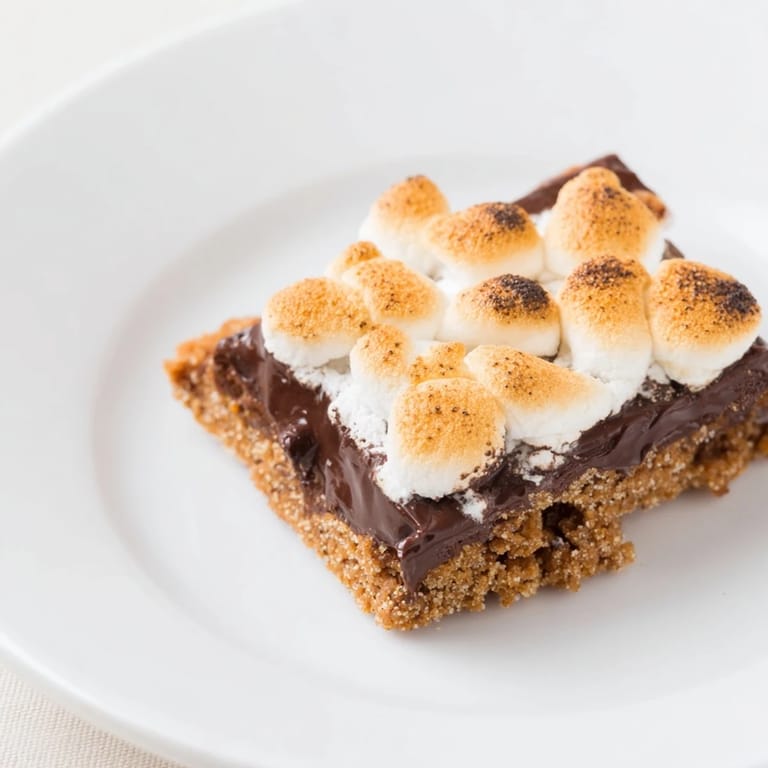
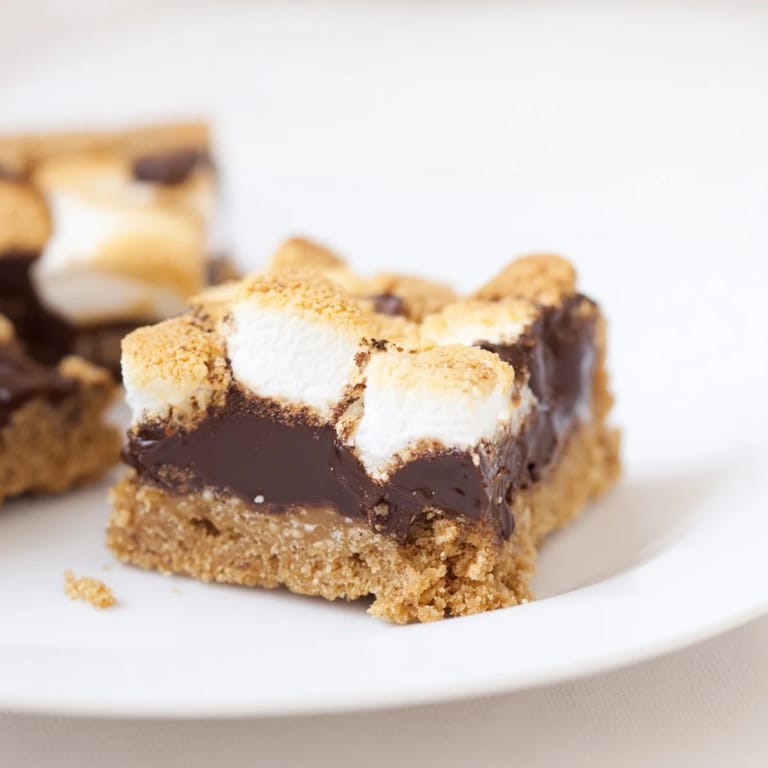
Save My neighbor knocked on the door one summer evening with a wild idea—why make s'mores the hard way when you could bake them into bars? I was skeptical at first, but twenty minutes later I pulled a tray of golden marshmallow-topped squares from the oven and understood instantly. No more assembling them one by one, no more singed fingers or melted chocolate dripping down wrists. Just pure, nostalgic s'mores goodness in a form that actually made sense for feeding a crowd.
I made these for my daughter's soccer team end-of-season party, and I watched their faces light up when they bit into that first bar—the way the warm marshmallow stuck to their teeth, the chocolate on their fingers. One kid asked if they were homemade, and when I said yes, he looked genuinely shocked that something this good came from our kitchen and not a bakery. That moment made me realize these bars had somehow become the thing people ask me to bring now.
Ingredients
- Graham cracker crumbs (1 1/2 cups): The foundation that holds everything together—use fresh ones if you can, as older crackers turn powdery and lose their flavor edge.
- Unsalted butter, melted (1/2 cup): This binds the crust and adds richness; melted means it'll mix in smoothly without lumps.
- Granulated sugar (1/4 cup): Just enough to add slight sweetness without overpowering the graham cracker's toasted notes.
- Semi-sweet chocolate chips (1 1/2 cups): The heart of the bar; quality matters here since it's a main player, not a supporting act.
- Mini marshmallows (3 cups): The tiny ones toast more evenly than large ones and create those little pockets of air that make each bite interesting.
Tired of Takeout? 🥡
Get 10 meals you can make faster than delivery arrives. Seriously.
One email. No spam. Unsubscribe anytime.
Instructions
- Get your pan ready:
- Preheat to 350°F and line your 8x8-inch pan with parchment paper, leaving edges hanging over the sides—this is your magic trick for lifting the whole thing out later without crumbling.
- Build the crust:
- Mix graham cracker crumbs, melted butter, and sugar until it feels like wet sand. Press it firmly into the pan, using the bottom of a measuring cup to create an even, compact layer that won't crumble when you bite into it.
- Toast the foundation:
- Bake for 8 minutes until the crust is set and smells toasty, then pull it out—this small bake step matters because it firms everything up for what comes next.
- Melt the chocolate:
- Scatter chocolate chips over the warm crust and return to the oven for just 2 minutes; the residual heat melts them gently without scorching. Spread with a spatula in smooth, even strokes.
- Add the marshmallows:
- Press mini marshmallows gently into the chocolate layer so they make contact and toast evenly; if they're just sitting on top, they won't develop that golden crust you're after.
- Toast until golden:
- Bake for 10–12 minutes until the marshmallow tops turn that perfect light brown color—watch through the oven window during the last few minutes because the line between golden and burnt is thin.
- Cool and chill:
- Let them rest completely in the pan, then refrigerate for at least 1 hour; cold bars slice cleanly instead of squishing and pulling apart.
- Slice and serve:
- Lift the whole thing out using the parchment paper overhang, place on a cutting board, and use a sharp knife dipped in hot water to cut clean squares.
 Save
Save There's something special about pulling a warm s'mores bar from the oven and watching the marshmallow wobble slightly on top—it means you've nailed it. That moment of anticipation, knowing you're about to bite into something that tastes exactly like summer, is half the reason I keep making them.
Why These Beat Traditional S'mores
The truth is, I love a campfire s'more, but these bars solve every problem I've ever had with the traditional version. No one's marshmallow falls into the fire, nobody's chocolate smears all over their face, and you can actually eat more than one without feeling like you've wrestled a mess. Plus, they taste just as good, sometimes better, because every bite has the exact same ratio of chocolate to marshmallow to crust.
Storage and Make-Ahead Tips
These bars stay good in an airtight container at room temperature for about three days, though I've never had them last that long. If you want to make them ahead, assemble everything up to the marshmallow layer, cover it, and refrigerate overnight; just add the marshmallows and bake when you're ready. They reheat beautifully in a 300°F oven for five minutes if you want that warm, gooey texture back.
Flavor Variations Worth Trying
Once you've nailed the basic version, you can play around without losing what makes them special. A tiny pinch of sea salt in the crust adds sophistication, or swap half the semi-sweet chips for dark chocolate if your crowd leans that way. Some people use digestive biscuits instead of graham crackers for a slightly different crunch, and honestly, it works just as well.
- For extra depth, sprinkle a tiny bit of sea salt over the chocolate layer before adding marshmallows.
- Try using a mix of milk and dark chocolate chips for more complex flavor.
- Serve them slightly warm with a glass of cold milk for the most nostalgic experience possible.
 Save
Save These bars are proof that sometimes the best desserts are the ones that capture a feeling instead of complicating things. Once you've made them, you'll understand why everyone keeps asking for more.
Recipe FAQs
- → Can I use a different chocolate type?
Yes, milk chocolate or dark chocolate can be substituted to adjust sweetness and richness according to preference.
- → How do I get the marshmallows toasted evenly?
Place the marshmallows on top and bake until golden brown, watching closely to prevent burning and achieve even toasting.
- → What is the best way to cut the bars cleanly?
Chill the bars in the refrigerator for at least one hour before slicing to prevent crumbling and ensure neat pieces.
- → Can I store these bars in advance?
Yes, keep them covered in the refrigerator for up to several days, allowing flavors to meld while maintaining texture.
- → Are there alternatives to graham crackers for the crust?
Digestive biscuits or other crumbly cookies can be used as a crust base for a similar texture and flavor profile.