 Save
Save The sound of laughter and clinking glasses always makes the kitchen feel charged with anticipation, especially when I'm making these cheesecake bites for a celebration. One afternoon, music thumping from the living room, I found myself swirling together cream cheese and sugar, the tangy scent mingling with the buttery aroma of warm graham cracker crusts. Even as confetti threatened to sneak its way into the mixing bowl, I remember thinking this recipe was almost too simple to be so loved. Standing over the mini muffin tin, I started plotting ways to top them—would chocolate caps get more cheers than fresh berries? The little decisions became part of the party magic.
I once made these the morning before my cousin's graduation, sunlight streaming through while my brother tried to swipe spoonfuls of the filling when he thought I wasn't looking. Later, as the room filled up with congratulations and camera flashes, the cheesecake bites disappeared at an alarming speed, with one uncle whispering that it was the best bite-sized dessert he'd tried all year. Something about their size makes them perfect for grabbing between hugs and photo ops, making both baker and eater feel clever.
Ingredients
- Graham cracker crumbs: These build a crunchy, slightly sweet base—pulse the crackers yourself for bigger, rustic bits if you like a heartier crust.
- Granulated sugar: Fine sugar ensures even sweetness in both the crust and filling; I sometimes decrease it slightly in the crust if I'm adding a very sweet topping.
- Unsalted butter: Melting it lets every crumb soak in flavor and helps the crust set crisply.
- Cream cheese: Full-fat and softened is best for the creamiest, lump-free result—let it come to room temperature for easier mixing.
- Eggs: These create that classic cheesecake set—a gentle hand when mixing avoids overbeating and keeps the bites tender.
- Vanilla extract: True vanilla brings an aromatic warmth that balances the tang.
- Sour cream: Just a bit adds subtle tanginess for the signature cheesecake flavor; whisk gently to avoid thinning the batter too much.
- Salt: Only a pinch, but it lifts the creamy and sweet notes so they pop.
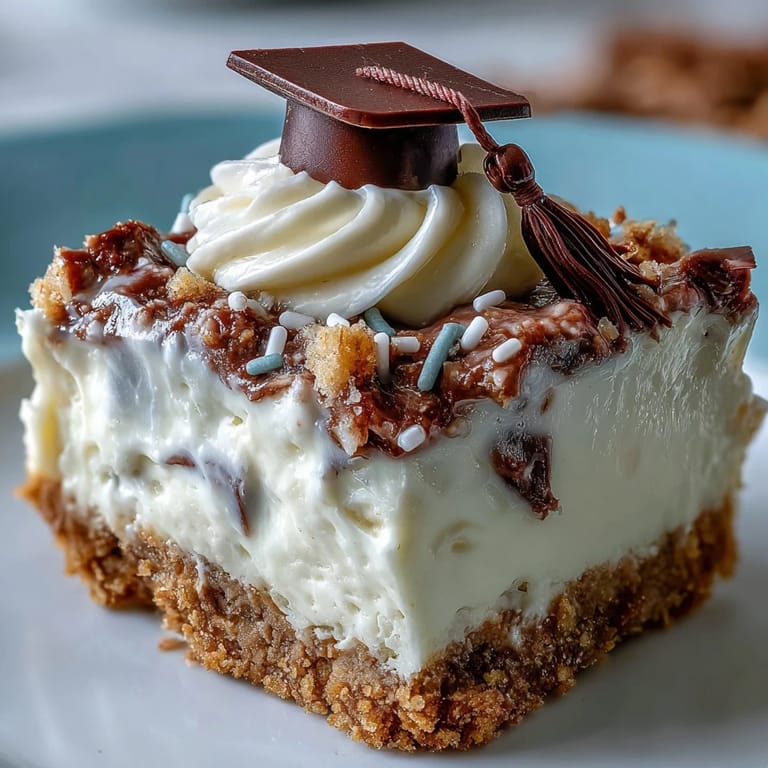
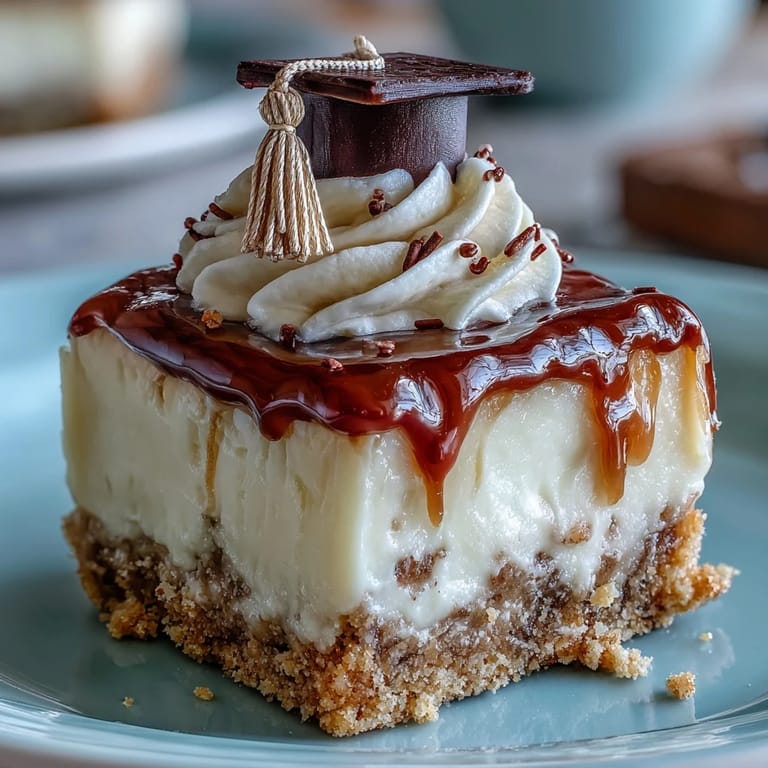
- Whipped cream & festive decorations: Finish with a flourish—sprinkles, chocolate caps, or a smattering of berries invite everyone to grab one.
Tired of Takeout? 🥡
Get 10 meals you can make faster than delivery arrives. Seriously.
One email. No spam. Unsubscribe anytime.
Instructions
- Line and preheat:
- Get your oven to 325°F (160°C) and tuck paper liners into your mini muffin tin—the anticipation starts here.
- Mix and press the crust:
- Stir together graham crumbs, sugar, and melted butter until it feels like wet sand, then use a spoon to firmly press it into each liner—don't be shy, a compact base keeps the bites tidy.
- Bake and cool the crust:
- Slide the tray in for 5 minutes, just enough for the kitchen to fill with warm, toasty scents.
- Prepare the filling:
- Whip softened cream cheese with sugar until fluffy—listen for the sound of the mixer thickening—then blend in eggs one at a time, followed by vanilla, sour cream, and a pinch of salt until smooth but not overbeaten.
- Fill the cups:
- Spoon the luscious cheesecake batter over the crusts, filling each nearly to the brim; I use a small cookie scoop for neatness.
- Bake the cheesecake bites:
- Back into the oven for 13–15 minutes; when the centers have the slightest jiggle, they’re done—don’t worry if they look pale, that’s perfect.
- Cool down:
- Let them rest in the pan for 10 minutes, then transfer to a wire rack as steam rises softly—wait until room temperature before a quick chill in the fridge for at least 30 minutes.
- Add toppings and serve:
- Just before serving, swirl on whipped cream and sprinkle with your favorite decorations—each bite gets its own personality.
 Save
Save 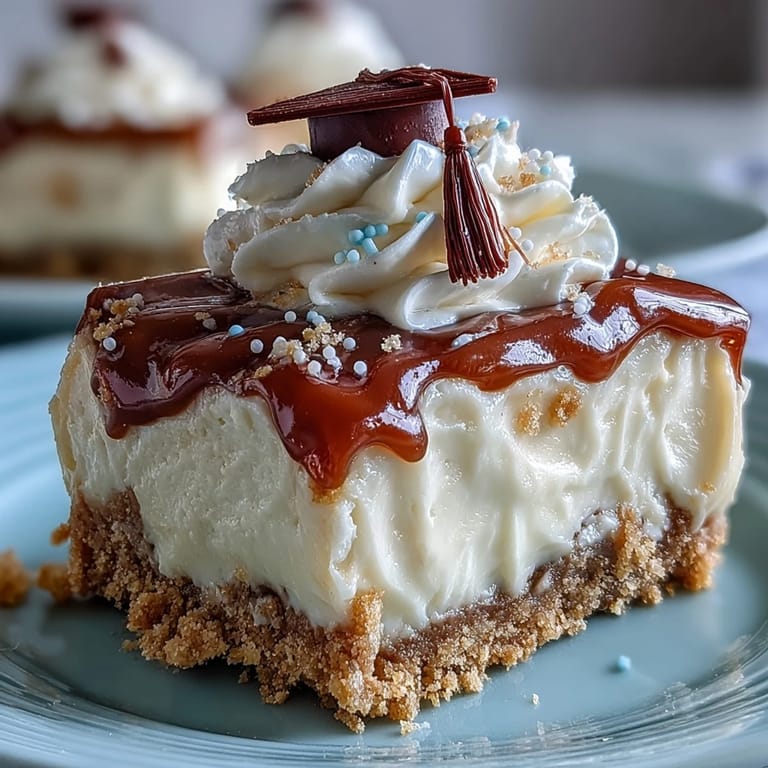 Save
Save Watching friends and family pop these cheesecakes into their mouths as cheers erupted from the backyard made it feel like the real celebration had landed—not just for the graduate, but for everyone sharing in the sweet success.
Making It Ahead—And Keeping It Fresh
Whenever I need to stay organized, making these bites the night before saves my sanity. They hold up well in the fridge, and you can leave the fun part—the toppings—for right before serving, so nothing deflates or gets soggy.
Creative Graduation Toppers
I once watched a group of kids gleefully building chocolate caps from mini squares and licorice strings, their creations slightly lopsided but utterly charming. Raiding your pantry for colorful sprinkles or slicing up a few berries guarantees each tray looks different and festive without extra stress.
Mini Bites, Big Impact
I've noticed people appreciate the chance to sample a bite-sized dessert without committing to a full slice, and it keeps the party moving. Having multiple flavors or colors on one tray encourages everyone to mingle and compare favorites—sometimes, the best part is watching which ones vanish first.
- Let the cheesecakes cool completely before adding toppings to avoid melting.
- If you’re short on time, store-bought whipped cream works in a pinch.
- Keep leftovers chilled in a covered container so they're just as good the next day.
 Save
Save  Save
Save There’s something special about offering up a platter of tiny, celebratory cheesecakes—they’re as joyful to give as they are to eat. I hope your next party is all the sweeter for them.
Recipe FAQs
- → How can I avoid cracked tops on the cheesecakes?
Beat the cream cheese until smooth but avoid overmixing once eggs are added. Bake until centers are just set with a slight jiggle, then cool gradually in the pan before chilling to minimize cracks.
- → Can I swap the graham crust for something else?
Yes—crushed chocolate cookies or shortbread crumbs make great alternatives. Mix crumbs with melted butter and press firmly into the liners for an even base.
- → What makes the filling smooth and creamy?
Use room-temperature cream cheese and beat until fully smooth before adding sugar and eggs. Fold in sour cream gently to keep the texture silky without incorporating too much air.
- → How long should I chill the bites before serving?
Chill at least 30 minutes to set the filling, though a few hours improves texture and flavor. Keep them refrigerated until just before decorating and serving.
- → Are there quick topping ideas for a graduation theme?
Top with whipped cream, festive sprinkles, fresh berries, or mini chocolate squares fashioned into caps. Use licorice or thin fruit leather for tassels to add a celebratory touch.
- → How should I store leftover cheesecake bites?
Store in an airtight container in the refrigerator for up to 3 days. For longer storage, freeze on a tray until firm, then transfer to a sealed container and thaw in the fridge before serving.