 Save
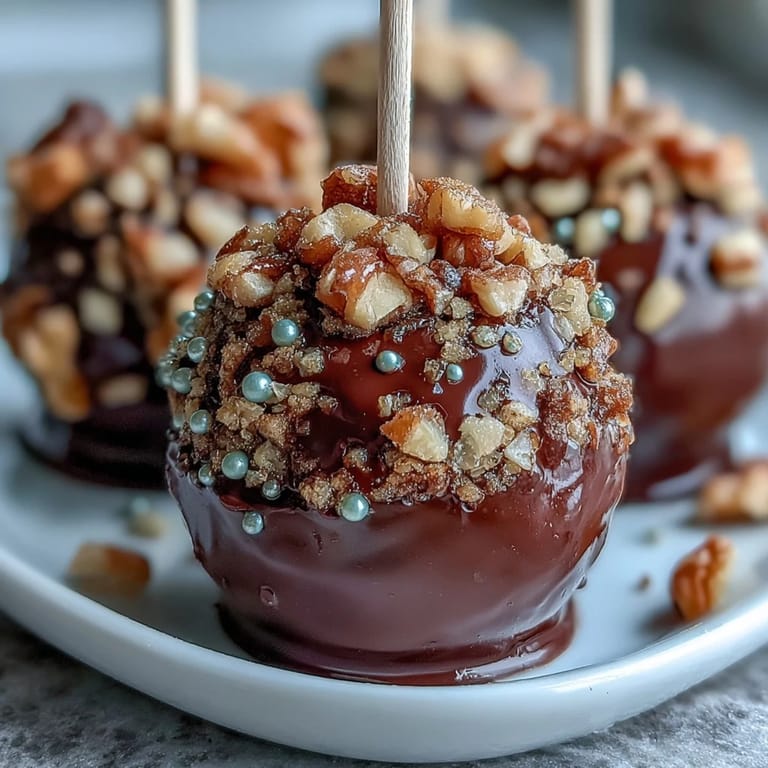
Save These enchanting Pot of Gold Cake Pops bring the magic of St. Patrick's Day to life with their whimsical design and irresistible chocolate flavor. Crafted to resemble miniature cauldrons brimming with edible gold treasure, each bite-sized treat combines rich chocolate cake with a glossy black candy coating and shimmering gold sprinkles that capture the spirit of Irish folklore. Whether you're hosting a festive gathering or simply looking to add a touch of luck to your dessert table, these adorable cake pops deliver both visual charm and delicious satisfaction.
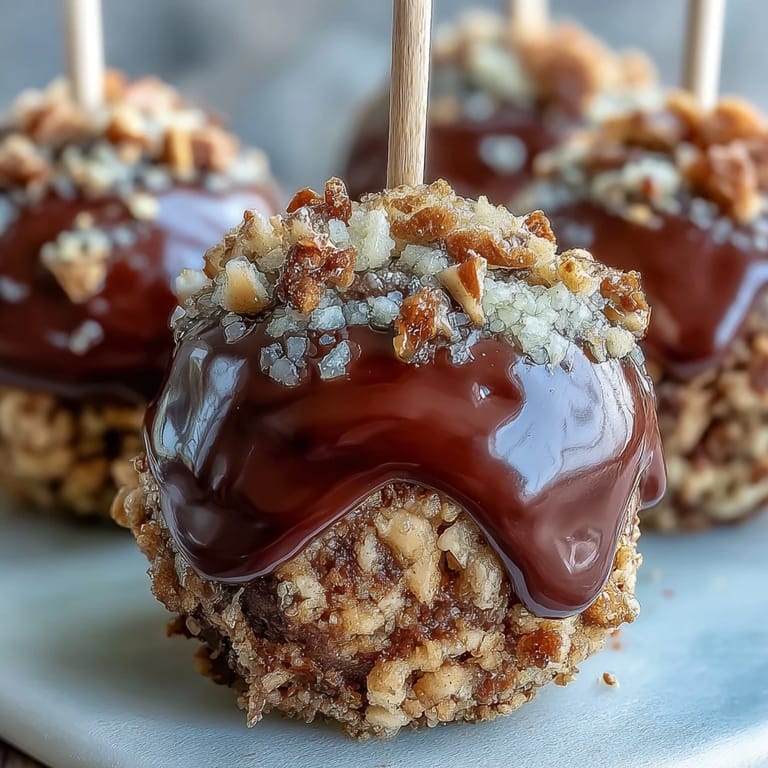
Save The beauty of these cake pops lies in their clever combination of simplicity and stunning presentation. By transforming a basic chocolate cake into handheld treasures, you create an interactive dessert experience that's both playful and elegant. The contrast between the dark candy coating and brilliant gold sprinkles mimics the mythical pots of gold at the end of the rainbow, while the optional shamrock accents add an authentic Irish touch that makes these treats truly special for the holiday.
Ingredients
Tired of Takeout? 🥡
Get 10 meals you can make faster than delivery arrives. Seriously.
One email. No spam. Unsubscribe anytime.
- Cake: 1 box (400 g) chocolate cake mix (plus eggs, oil, and water as required by package)
- Frosting: 120 g (½ cup) chocolate frosting (store-bought or homemade)
- Decoration: 400 g (14 oz) black candy melts
- 48 g (2 oz) gold sprinkles or edible gold pearls
- 24 lollipop sticks
- 50 g (1.75 oz) white candy melts (optional, for accents)
- Optional: Green fondant or sprinkles for shamrocks
Instructions
- Step 1
- Preheat oven and prepare the chocolate cake according to package instructions. Bake, then allow to cool completely.
- Step 2
- Crumble the cooled cake into fine crumbs in a large bowl.
- Step 3
- Add chocolate frosting to the crumbs and mix until a dough-like consistency forms.
- Step 4
- Scoop and roll the mixture into 24 balls (about 1.5 inches in diameter). Flatten the tops slightly to mimic a pot shape.
- Step 5
- Place balls on a parchment-lined tray and refrigerate for 30 minutes.
- Step 6
- Melt black candy melts according to package instructions.
- Step 7
- Dip the tip of each lollipop stick into the melted candy, then insert it halfway into each cake ball.
- Step 8
- Chill for 10 minutes to set the sticks.
- Step 9
- Dip each cake pop fully into melted black candy melts, letting excess drip off. Stand upright in a styrofoam block or cake pop stand.
- Step 10
- Before the coating sets, immediately decorate the tops with gold sprinkles to resemble coins.
- Step 11
- For extra detail, pipe a rim around the top of each pot with additional melted black or white candy melts.
- Step 12
- Add green fondant or sprinkles for shamrock accents, if desired.
- Step 13
- Let cake pops set completely before serving.
Zusatztipps für die Zubereitung
Achieving the perfect pot shape requires a gentle hand when flattening the cake balls—press just enough to create a slightly concave top without cracking the surface. When dipping the cake pops, work quickly but carefully, tapping the stick gently against the bowl's edge to remove excess coating for a smooth, professional finish. The key to successful decoration is timing: add your gold sprinkles immediately after dipping while the candy coating is still wet, ensuring they adhere properly. For the cleanest presentation, use a styrofoam block to hold the pops upright while they set, preventing any drips or smudges.
Varianten und Anpassungen
Transform these cake pops to suit different occasions or dietary needs with simple modifications. For a gluten-free version, substitute with gluten-free cake mix and verify all decorations are certified gluten-free. Create a vanilla variation by using white or vanilla cake mix with vanilla frosting, then coat with green candy melts for a reversed color scheme. For an extra-decadent treat, add a teaspoon of Irish cream liqueur to the frosting mixture. Those seeking a nut-free option should carefully check all candy melt and sprinkle labels, as cross-contamination can occur. You can also experiment with different metallic sprinkle colors like silver or bronze for year-round celebrations beyond St. Patrick's Day.
Serviervorschläge
Display these festive cake pops as the centerpiece of your St. Patrick's Day dessert spread by arranging them in a decorative vase filled with green tissue paper or arranging them on a tiered cake stand for visual impact. Pair them with Irish coffee or hot chocolate for a complete treat experience that balances the sweetness. For parties, create individual servings by wrapping each cake pop in clear cellophane tied with green ribbon as charming party favors. Consider serving alongside other Irish-themed treats like shamrock cookies or mint brownies to create a cohesive dessert table. The cake pops also work beautifully as cupcake toppers or incorporated into a larger rainbow-themed dessert display.
 Save
Save These Pot of Gold Cake Pops prove that festive baking doesn't have to be complicated to be impressive. With their delightful combination of rich chocolate flavor, eye-catching design, and easy preparation method, they're destined to become a St. Patrick's Day tradition in your home. Whether you're an experienced baker or just starting your culinary journey, this medium-difficulty recipe offers the perfect balance of creative fun and achievable results. Gather your ingredients, embrace the Irish spirit, and create these magical treats that capture the joy and whimsy of the holiday in every delicious bite.
Recipe FAQs
- → How do I ensure the cake crumbs bind well?
Mix the cake crumbs thoroughly with chocolate frosting until you achieve a dough-like consistency that holds shape when rolled.
- → What’s the best way to coat cake pops evenly?
Dip the chilled cake balls in melted candy melts and gently tap off excess to ensure a smooth, even coating.
- → Can I add other decorations besides gold sprinkles?
Yes, use green fondant or sprinkles to add shamrock accents for extra festive flair.
- → How should these treats be stored?
Store in an airtight container at room temperature, ideally consuming within three days for optimum freshness.
- → Is it possible to make these gluten-free?
Use gluten-free cake mix and confirm all decoration ingredients are gluten-free to adapt these treats.